Equipment And Breeding Fish

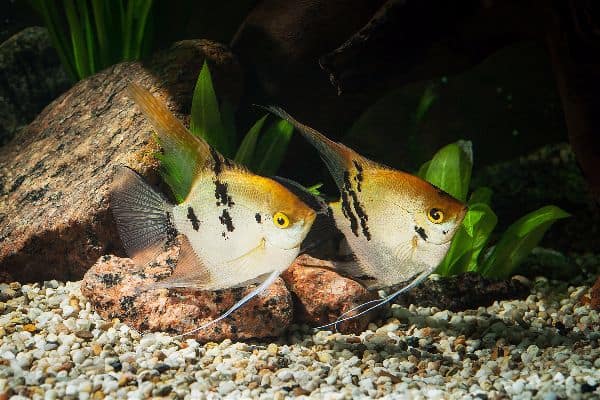
Let’s take a look at how this article teaches fish breeding and introduces breeding equipment(guppy breeding tank, plastic breeding tank, . Space is the primary condition for the successful spawning of many species. As the breeding time of fish approaches, they tend to become territorial. During this time, most males become very aggressive and will drive away any potential competitors. This is especially dangerous for young fish, and even more dangerous if they cannot get to a safer place away from offensive fish males. The initial requirement for fish breeding is enough space for them to chase, hide and move. Some species require very little space and do not become particularly aggressive.

Things You Need to Know About Fish Breeding

Some fish enter the spawning state after receiving nutritious food. Therefore, it is a good practice to give special attention to breeders who are going to spawn fish. This kind of special attention aims at bringing the fish to their topmost reproductive state. If you have some extra aquariums, place the two sexes separately in the two aquariums.

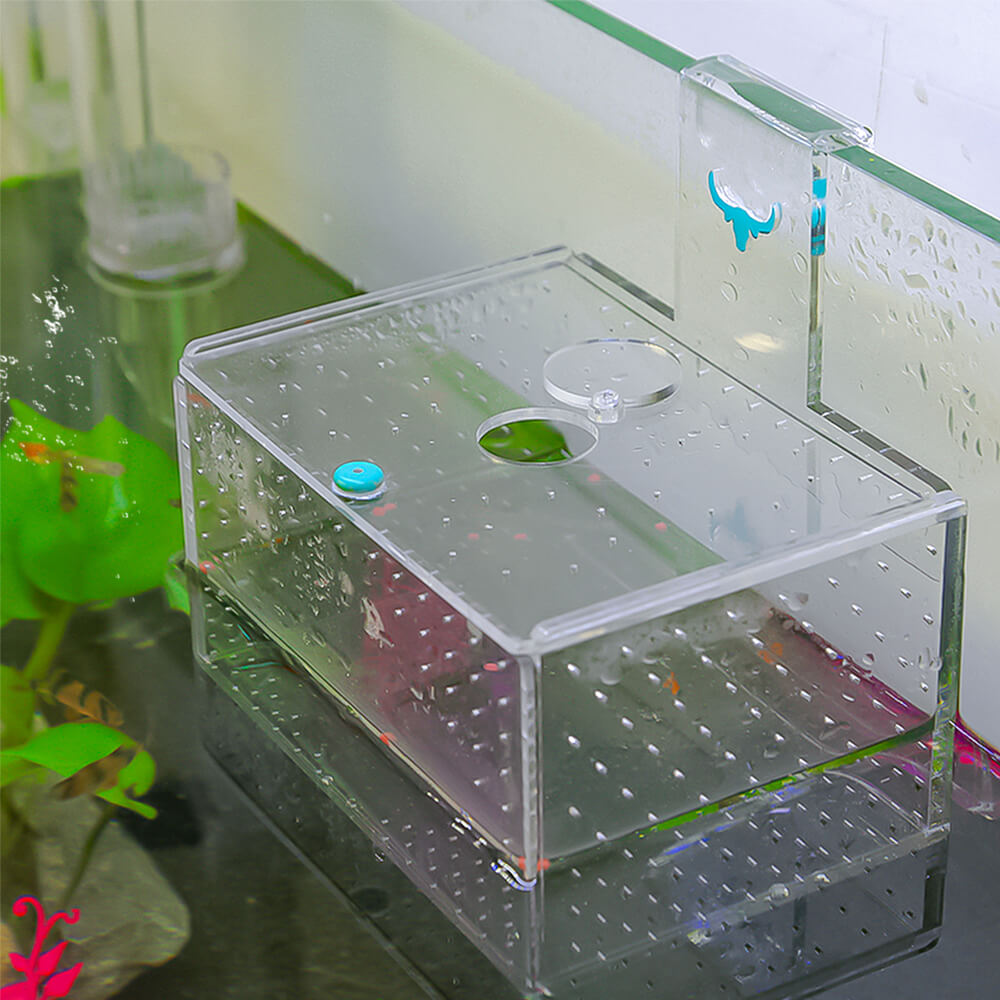
When your fish is ready to spawn, a delivery fish tank is a wise choice. This prevents fry from being eaten by other fish. Since some fish can become very strained at this stage and tend to jump out, a tight lid should be placed on the tank. The conditions in the delivery aquarium should be as close to those in the original aquarium as possible. This will save the parent fish from any undesirable stress at such a critical stage in the breeding cycle.

An aquarium dedicated to rearing fry is also desirable. If the parents are protective, they do not necessarily need to be removed. The needs and requirements of the fry are very different from those of big fish. They need special food, at least until they grow bigger. Filtering must also be changed to accommodate fry. As the fry start developing you can perform a 10% water change the first few days, and then raise this up to a 40% water change every day to keep the water clean. Clean water helps keep your fry healthy and fast-growing. Optimal survival of the fry is ensured if you segregate the fry depending on their size. The fastest-growing fry is almost always males. The bigger fry will eat the smaller ones if they are not separated.

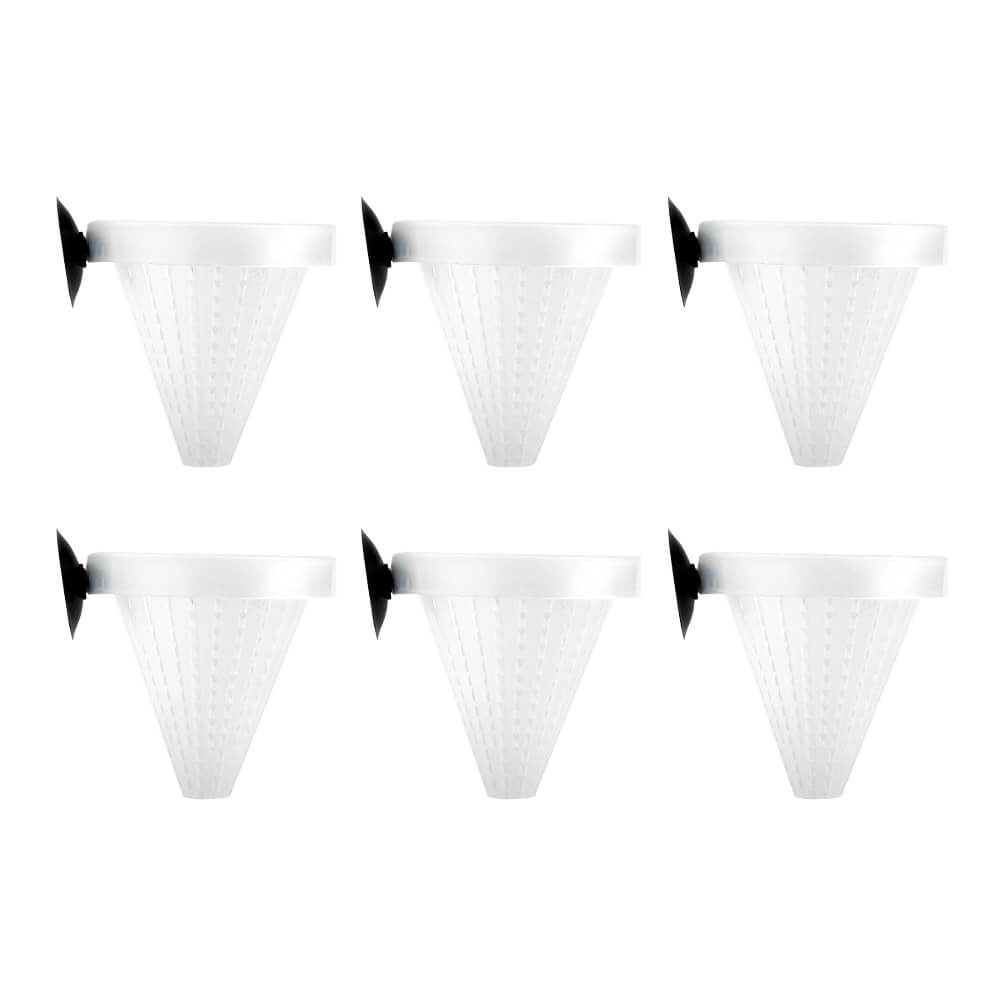
Some use breeding traps as a place where female carriers can put her fry to grow. As a result, fry is inaccessible because they will be placed in a separate plastic compartment and attached to the edge of the aquarium. If the breeding aquarium is too small to accommodate the female, the chances of her miscarrying while struggling to escape are very high.

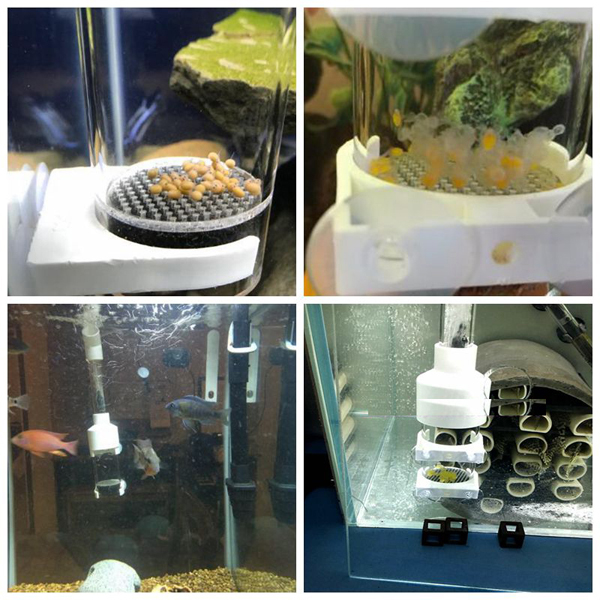
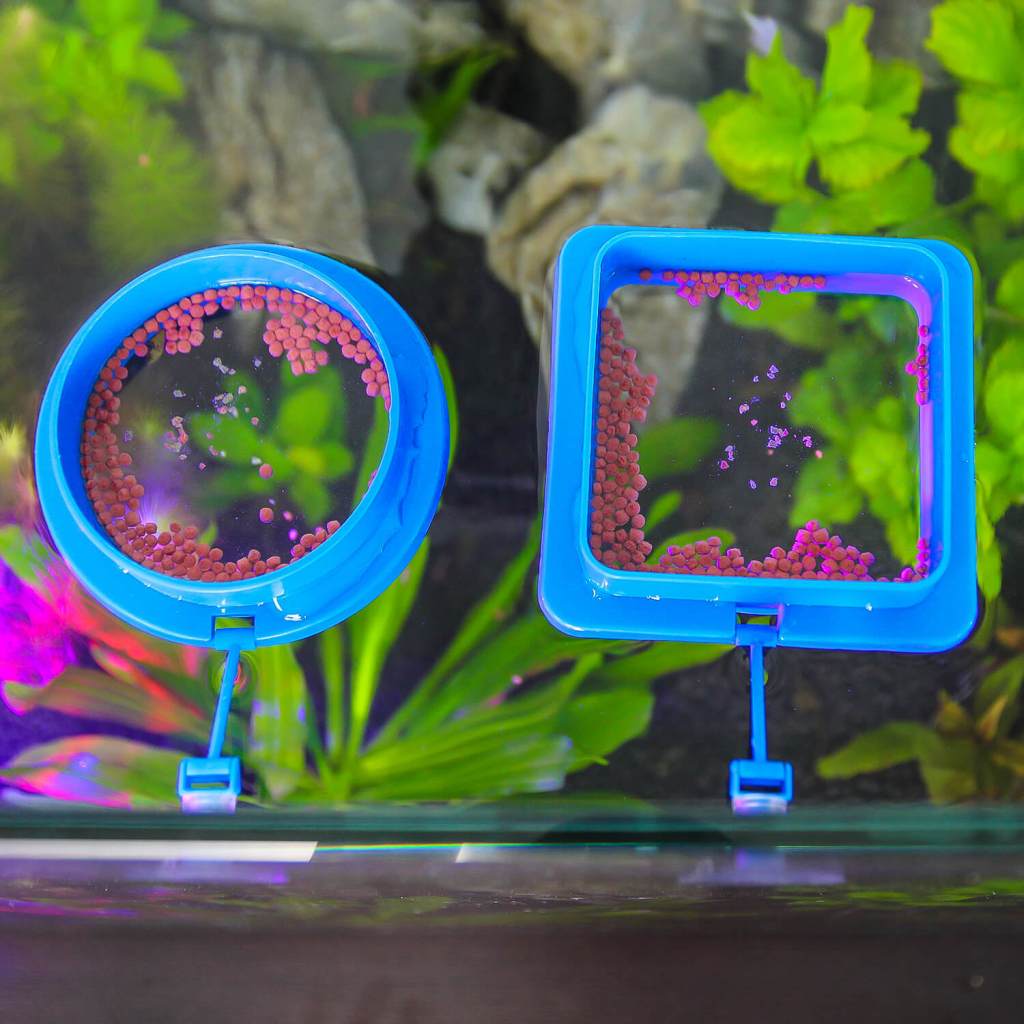
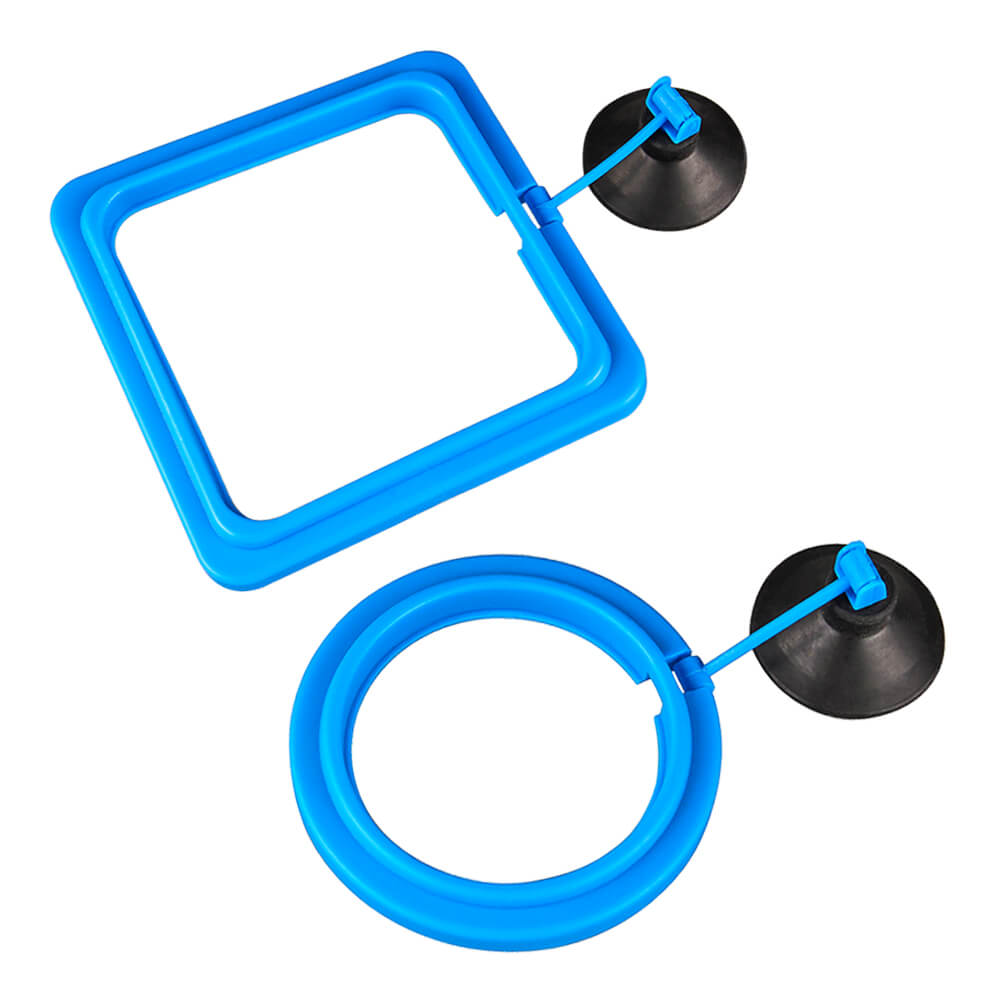
According to the characteristics of different types of fish, a spawning aquarium with different types of fish should be set up. Scatterers will eat their own eggs. So be careful not to let their eggs fall in the reach of their parents. For this small fish, a 5-10 gallon capacity fish tank is the best choice. The parents should be removed after spawning. If the fish lays non-adhesive eggs, it is better to put nylon netting just above the aquarium floor. The eggs will then fall out of the reach of the parents. In case the eggs are adhesive, then they will be laid among the leaves of plants.

Things You Need to Care for the Aquarium for Breeding

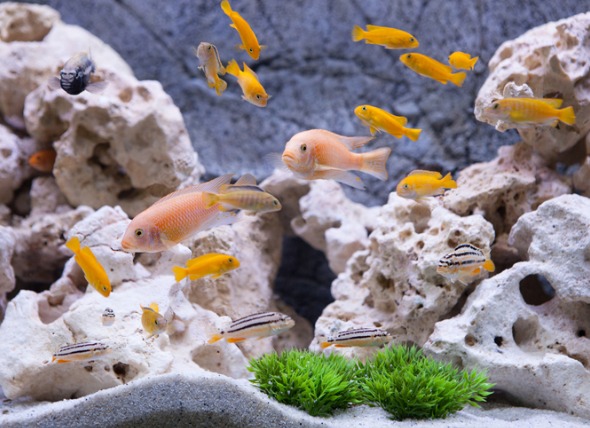
Aquariums should be decorated according to egg depositors’ behavior. It is advisable to provide these fish with broad-leafed plants, flat stones, upturned flower pots, coconut shells, or rocky caves. If your fish live in rocky areas in the wild, they will appreciate caves or flat stones as breeding places, and so on. Placing plants and caves gives fish a sense of security, even if they are not spawners.

Since the eggs and the young are protected by their parents, the mouthbrooder can stay in the main tank even when spawning. However, brooding does bring aggression and brooding fished can cause harm to any other fish in the aquarium. For this reason alone, it is best to put these fish in a new aquarium while they are breeding.

Building a new aquarium for breeding purposes is fairly easy. You don’t need to go through all the steps to start a new aquarium. Because you can use water and bacteria from your original aquarium. Another fish tank for breeding does not need to be very large. A 2-6 gallon tank is usually sufficient for most fish. The best way to set up your new aquarium is easy to take water from your existing aquarium and use this to set up your new aquarium. Since the fish are being transported from the old aquarium, they will already be acclimatized to this water. Using a foam filter for a few weeks in your old aquarium will help you collect a good quantity of beneficial bacteria that can be easily moved to the new aquarium. Decorations and plants can be kept to a minimum for most species. Changing the water in this aquarium regularly is a must. The best way to clean out the material wastes in this aquarium is to siphon it out using a flexible pipe.

Remember, it’s easy to take some fry out when you siphon out the waste. Therefore, it is best to siphon the waste into a clean bucket. This will help you to save some annoying little fish fry without too much trouble.

Looking for  breeding tanks for sale?Didn’t find the info you were looking for? Leave a comment or contact our aquarium expert now! Our knowledgeable staff responds to any question within 24 hours.

Effective Fish Breeding

Effective fish breeding requires a lot of time, patience and care from the aquarium owner. And choose a good breeder tank is very importent in fish breeding process. Senzeal is the ultimate destination for aquarium accessories, here it provides a variety of aquarium-related products,such  as breeding cage for guppies, bubble lights led etc.

Anything you put in the aquarium can trap the debris. As soon as the fry come out, you need to clear any settings that might have been trapped in the aquarium. You can also add one or several snails into the aquarium. Apple snails do not attack any fish. These snails eat residue and dead fry. Apple snails do not eat live fry, which is very important for fish breeding. Apple snails also produce a good supply of infusorians and can even provide the very first supply of food.

Tips for Starting Fish Breeding

It is a good idea to keep a detailed log of the entire process, which will help you a lot when you need to repeat the process. You should keep accounts of the species name, the detailed water chemistry, filtration and aeration methods, approximate ages of the parents, when the female was added, the date on which the fry was released/hatched, the frys first food and the body size of the fry till it reaches about three months of age.

In some time, even if you do almost everything to ensure that your fish breeding program is successful, you will find that your fish does not breed and grow as expected. All conditions were fulfilled, but the results still failed. In this case, it is best to start the process with a target fish. This works best in territory fish. Target fish is a threat to territory fish. The male sees the new fish possible encroacher in his territory, and he will then pair with the female fish to isolate the target fish. The important thing here is to ensure that your target fish is in reality not a threat to the existing fish or vice versa. For example, when trying to breed small cichlids, using some zebra danios as target fish will not put any threat to any kind of fish. It should be noted that some species of fish will kill any kind of target fish, and such situations should be avoided. If this is the case, it will also suffice if you place the target fish in a different aquarium alongside the mating aquarium so that the male can see but not touch. If so, this will also be sufficient if you place the target fish in a mating aquarium next to a different aquarium so that the male can see it but not touch it.

Tips for Helping Fish Breeding

Sometimes the introduction of fish into a new aquarium is too stressful to venture into open public areas. They will hide for a few days and will refuse to settle somewhere. Such nervous fish will not pair up and breed. In this case, you can use one dither fish to calm the other fish. The dither fish is an easy-going, harmless fish. You must not choose a very active fish to make the situation tenser. Calm and peaceful mid-water fish are the best dither fish to choose to be added. Once the nervous fish see the dither fish swimming about happily without being consumed by predators, they too will settle down and come out of their hiding places. This is just to reassure the nervous fish that nothing will harm them when they venture into open public areas.

Didn’t find the info you were looking for? Leave a comment or contact our aquarium expert now! Our knowledgeable staff responds to any question within 24 hours. Check out more aquarium products now!

Caring for Freshwater Angelfish Eggs

When it comes to freshwater fish breeding in the aquarium, the most difficult task may be taking care of your eggs to hatch after fish has the eggs. Once the eggs are laid, you may need to take the female fish out of the tank and grow the eggs into big fish. Raising angelfish eggs isn’t as difficult as you might think — you just need to keep a few precautions in mind to increase your chances of successfully breeding. The most important thing is to make sure your angelfish eggs hatch and the fry grows, so make sure they’re well protected and well-fed. If you can complete both tasks, you will be rewarded with a healthy group of angelfish. In this process,you may use aquarium fish tank light to have a warm condition.

Breeding freshwater angelfish can be a rewarding experience but raising the eggs to maturity may be a challenge.

Basics of Breeding Angelfish

There are many different species of freshwater angelfish, ranging from black, white, and silver to bright yellow, orange, and red. These fish are attractive and are a popular addition to home aquariums. Part of the reason these fish are so popular, apart from their beautiful appearance, is that they are not particularly difficult to breed. A single spawning can result in hundreds of eggs, though many of them will not hatch. If you take a few precautions, however, you can raise a large number of angelfish eggs into adulthood. Breeding angelfish starts with setting up a proper breeding tank.

Your fish tank breeding net does not need to be carefully designed, all you need is the right water temperature, a pair of angelfish, a slate that angelfish can spawn. In the wild, angelfish like to lay their eggs on the broad leaves of the Amazon sword plant, but in the breeding tank, a slate with a 30-degree angle is also acceptable. Raising the temperature of your tank a few degrees, in addition to adding a little bit of water from another tank in which angelfish are successfully breeding, can help to encourage your angelfish. Once your fish have mated and spawned, you next need to focus on caring for the angelfish eggs.

Caring for Angelfish Eggs

There are many different kinds of angelfish, but all eggs can generally be raised in the same way. Once the eggs are placed on the slate, you can choose to take them out of the tank and keep them in a separate place or leave them in the tank for the fish’s parents to care for. If you choose to raise the eggs separately from the parents then you need to place them in a large container of water from the tank and insert an airstone on a low setting to achieve water flow – you may also choose to treat the water with methylene blue to keep off fungus. If you want to raise your angelfish eggs in the tank with the parents then you will need to take different precautions.

Once spawning, angelfish will protect their eggs very much-they may attack other fish who get too close to them, even their mates. To avoid too many offensive issues, you can clear all other fish in the fish tank. Except for one or two mild-tempered species, they can prevent angelfish from attacking each other, but they do not threaten the eggs.

Angelfish also tend to eat their own eggs, so if you choose to leave your angelfish eggs in the same fish tank as their parents, you need to pay close attention to the parents. Other fish may also be drawn to the eggs – plecostumus are particularly known to raid the eggs during the night when the adult angelfish are not keeping a close watch.

Caring for Angelfish Fry

After a few days, the angel fish’s eggs will germinate and will begin to wriggle while still adhering to the slate. In a few days, the eggs will absorb the yolk sac, separate from the slate, and swim around in the water tank by themselves. At this stage, the young will start to look for their own food. If the young and their parents are left in the tank, adult angelfish will have more difficult stages to protect them. In order to raise a majority of the fry to maturity, it is essential to keep them fed. Commercial fry food is not an adequate diet for angelfish fry – in order for the fry to thrive, they must be fed a diet of infusoria or newly hatched brine shrimp at least once a day (several times a day for best results).

Another important aspect of rearing angelfish fry involves protecting them from hungry fish and other potential dangers. When the fry hatch and begin to grow, removing any other fish from the fish tank can greatly increase the survival rate of most fry. If you don’t want to remove other fish, be sure to provide hidden areas for fry, such as large areas, and avoid using strong filters because fry can be easily sucked into the filter. Some aquarium enthusiasts use the mesh at the bottom of the tank to allow fry to swim out of reach of adult fish.

By following these tips you can successfully raise your angelfish eggs into healthy adults. By completing these tips closely, you can successfully develop your angelfish eggs into healthy adult fish. When raising angelfish fry, the most important thing is to feed the fish regularly to prevent the fry from being eaten. Most fry can survive up to 12 hours without food but should be fed four to five times a day for optimum results. With frequent feeding, your fry will grow faster and become more self-sufficient. Over time, you’ll have plenty of beautiful adult angelfish to enjoy.

Looking for more aquarium accessories online? Go to our category pages for more information.

The Guide to Cleaning Your Fish Tank

How often should you clean your fish tank?

Cleaning the fish tank is quite simple, but it needs to be done regularly. The best way to keep the tank clean is to do a little cleaning every day. It will also help you avoid doing a lot of cleaning, which is great pain and can also be harmful to your fish.There are some tools you may use,aquarium cleaning brush,aquarium cleaning pump kit,aquarium cleaning sponge etc.

There are no strict guidelines on how often you should clean the tank. It depends on how many gallons of water it can hold, how many fish you have (and which type), and the plants or animals you have to help keep it clean.

The cleaning schedule will also vary depending on whether you have a cold water tank or a tank that can be heated, whether it is freshwater or saltwater, what kind of filter or filter substance you are using, which kind of light you are using, and whether you have a UV sterilizer. As you can see, there are too many different factors to consider!

CHANGING THE WATER WHEN CLEANING A FISH TANK

Whether you’re keeping cold water or tropical fish – in freshwater or saltwater – partial water changes are essential for fish health.

Change the water when cleaning the water tank

Whether you’re raising coldwater or tropical fish-in freshwater or saltwater environments-any change to water is critical to the healthy growth of fish.

The guidelines are different each time it comes to the amount of water you should change. Some aquarists advise a 15% water change once a week, while others suggest 25% or even 30%. The best amount for your tank will depend on your tank size, how many fish you’re keeping in it, and what kind of filtration options you’re using. You can use different online calculators to help you figure out how much water you need to change and how often.

As a general rule, a 10-15% water change is a good start. As fish are sensitive creatures to environment changes, you don’t want to change too much water at once. It can stress your fish, and also potentially remove too much of the beneficial bacteria that live in the water.

How to Clean a Fish Tank

Before you start changing water, it’s important to make sure your hands are clean and dry. You want to make sure you’ve removed all traces of soap or detergent, as there are chemicals in these products that can be very harmful to your pets.

First, check your tank to see if there are algae. You can scrape this off with an algae scraper before changing the water. To change the water, use a siphon tube to remove around 10-15% of the volume in your tank. Many of fish tank siphons also include a gravel vacuum. These can help you to gently suction debris and algae out of the gravel as well. Be very gentle as you’re doing this, you don’t want to frighten your fish with lots of vigorous activity! Go slowly and give your pet time to adjust to what is happening.

To use a siphon tube, you don’t need to suck on one end to make the suction moving. Pour the water completely into your tank to fill the hose, and it will be much easier. Once it’s full, put your thumb over one of the open ends and then move that end out of the tank and into your bucket. The pressure will cause the water to enter the bucket by itself – no sucking required.

But wait, don’t throw away the water from this old tank! You should rinse or clean your filters and filter media with this water. This will allow you to retain the beneficial bacteria that have been colonized.

After you’ve vacuumed the gravel with the suction tube, you can pour your new water into the tank. You should use a special bucket for this step. Make sure you never use this bucket for anything else, and never let soap or detergent get into the bucket. Even the tiniest amount of residue can be harmful to your fish.

It is important that you do not use direct tap water as it may have chlorine and other additives that are harmful to the health of your fish. Fill your special fish water bucket with water and let it sit overnight to let the chlorine evaporate. Or, you can treat it with a dechlorinator. Once the water is ready to add, pour it into the tank slowly. You should add it in a gentle, slow stream so that it mixes well with the original tank water. You can also add it using the siphon method but in reverse.

Should You Remove Your Fish When Cleaning Your Tank?

Again, there are no hard and fast rules for changing water. It will depend on the size of your fish tank and the type of fish you have. If you have a very large tank, you may find your fish will move away while you’re cleaning an area and won’t need to be removed. If you are only making a small range of water changes-say 10-15%-then you should not remove fish, even in a small fish tank or bowl, because this kind of sudden change makes them uneasy.

As you can see, you can benefit a lot if you insist on cleaning your aquarium regularly Not only does regular aquarium clean and maintenance help keeps your fish healthy and thriving, it gives you the best chance of being top of any issues before they become real problems that might harm your fish.

Your fish will thank you for the fresh, clean water environment, and you’ll have a beautiful, sparkling tank to admire. What could be better?!

What do you think? In your experience, what is the best frequency for cleaning the fish tank? What water changes are you doing?

Of course, you DO need to take care of your fish properly. That includes understanding how to clean a fish tank, how often you should clean your fish tank and the equipment that will help keep it clean.

The following 5 in 1 kit is one of best values hat we have seen as it includes a Fishing net, gravel rake, plant fork, cleaning sponge, an algae scraper all-in-one! We highly recommend this cleaning kit! The link: https://www.senzeal.com/5-in-1-cleaning-tool-kit-extension-type-p0746.html

How to Set Up a Fish Tank and Keep It Clean

Setting up an aquarium may seem difficult at first, but once you start working, you will find it much easier to complete it than you might have thought.

First, you will need to decide which type of fish you want. Some great starter fish for beginner fishkeepers include mollies, platies and tetras.

Before you start setting up the fish tank

Here is a step-by-step guide on how to set up and keep a fish tank clean, as well as answers to some common questions about fish tank maintenance.

Once this decision is made, you can get the right equipment and tanks for your selected species of fish. However, please stop the purchase of your fish for a while until your fish tank has been finished. Creating a habitable environment with safe water conditions can take a lot longer than you think.

To help your fish thrive, follow the following steps to create the perfect aquarium environment for them.

Easy, 10-Step Fish Tank Setup Guide

Before starting the setup process, choose a permanent location for your fish tank. Once it is decided and filled with water, the aquarium is not easy to move because of its bulky and delicate.

The best place to put the fish tank is without direct sunlight and free of drafts.

Step 1:

Rinse the tank with warm water, and wipe it out with a paper towel if necessary. NEVER use any kind of soaps or detergents which are very harmful to your fish.

Related product: water temperature control for fish tank

Step 2:

Thoroughly rinse the substrate of your choice (gravel, aquarium rock, sand, etc.) and any other tank decorations with warm water.

Rinse the gravel and rocks with a colander until the water passes clean and free of debris.

You can then add layers of the substrate to your clean fish tank. Be careful when moving the substrate, as gravel, rocks, and sand can scratch the fish tank. Add some extra substrate in some places where you plan to add plants so that their roots have room.

Your plants and decorations will be added later. (Aquarium decorations for sale)

Step 3:

Fill a third of your tank from a clean bucket with room temperature, aquarium-specific water.

To add water without upsetting the freshly laid substrate, you can place a plate or flat object inside your tank and slowly pour the water onto that.

Step 4:

Set up all your aquarium equipment. Add and turn on your filtration system. Connect your airline tubing from the air pump to any bubble bars or air-driven decorations that you may have.

Related product: aquarium pumps and filters

Step 5:

Properly add any living or artificial plants and other decorations you want to the fish tank. Ideally, these can be set up to cover off your air/plumbing lines and filtration equipment to make the overall look more aesthetically pleasing.

If you opt for live plants, make sure that the water is warm enough before planting them in the gravel to avoid shocking the roots and killing the plant.

Step 6:

Finish filling the tank with aquarium water, leaving some space between the water surface and the lid (especially if you have fish that are prone to jumping).

Step 7:

Start the process of setting up your biological filter. “Cycling” a tank refers to the colonization of beneficial bacteria (nitrifying bacteria, purple non-sulfur bacteria, etc.) on specially made media.

Cycled media remove dangerous ammonia and nitrite. Central to the process is the addition of “fuel” for the microbes. To do this, you can use an aquarium-specific, ammonia-based mixture. Although it was once common to add a cheap, cold-resistant, fermented fish as an ammonia source, people now dismiss it as inappropriate.

The length of cycling time is dependent on many factors, so continue to conduct water tests once a week throughout the process as to be certain the biofilter has completely stabilized (i.e., until ammonia and nitrite have risen and then fallen back to nondetectable levels).

Typically, this process will take 6-8 weeks.

Step 8:

Position your submersible heater in an area of strong water flow. Then, place an in-tank thermometer on the opposite side of the tank as far away from the heater as possible.

This will help to ensure that the whole tank is maintaining the correct temperature.

Step 9:

Plugin and turn on the air/water pump(s), filter, and heater. Let your setup run for 24 hours before adding any fish (this provides time for the temperature to stabilize and for you to make any necessary adjustments).

Step 10:

After 24 hours of waiting, you are ready to move your fish to their new home. You should start with a few fish (the general rule is 1 inch of fish per gallon of water). You can then slowly add more to the tank (over a period of a few weeks or months).

To add your fish, first, float the fish bag in your tank water; this will adjust the temperature difference between the tank water and the transport water. After about 15 minutes (when the temperature has equilibrated), gently pour the entire contents of the bag into a clean bucket. (Not directly into the water tank yet)

Add approximately a quarter cup of tank water to the bucket every minute or so until the transport water has been diluted with tank water by a factor of at least 5x.

At this point, it is safe to scoop each fish up from the bucket with an aquarium net and carefully release them one by one into the tank. Discard the wastewater in the bucket (do NOT add it to the tank)!

Tips for Cleaning and Maintaining Your Fish Tank

Cleaning your aquarium is not as complicated as setting it up. For most systems, a 25% water change is recommended every 2-4 weeks, or a 10-15% water change every week.

Unless absolutely necessary, removing your fish during cleaning is not recommended; removal can put them under pressure and make them sick. If necessary, gently remove the fish with a net and place them in a large bucket with some of the original tank water.

Before draining any tank water, turn off heaters, pumps, and filters, and remove all decorations like artificial plants. Wash the decorations with warm, clean water and set them aside.

Use the aquarium’s gravel cleaner to vacuum the gravel until you remove about a third of the water from the tank. Again, be sure to replace the old water with fresh, pre-treated water at the same temperature as the old water.

Pure water is ideal because it contains fewer nutrients to dissolve which is responsible for the loss of algae growth.

If you want to buy betta heaterbrine shrimp incubator…at a reasonable price, then believe me Senzeal must be the best choice for you. Senzeal is the ultimate destination for aquarium accessories, here it provides a variety of aquarium-related products, mainly including sustainable and high quality aquatic biological equipment, aquarium accessories, aquarium decorations, fish care, and plant care, to provide you with the best shopping experience. Our online store offers the latest and best quality of aquarium-related products. Therefore our facilities use state-of-the-art equipment and technology to maintain the water quality conditions and the optimum health of all aquatic life. You can comfortably shop on Senzeal.com at home, we will use the safest transportation system, to ensure that all products before arriving at your home can get the best care.

How do I feed frozen bloodworm to fish?

If you, like many others, chose to feed frozen bloodworms to your fish, then this is a useful guide article that not only suggests the necessary steps, but also explains why we choose to recommend bloodworms as fish food, and potential risks when feeding with alternative foods.

Warning

Overfeeding is the most common mistake made by fish owners. Overfeeding can clog filters and break down toxins that are harmful to fish. Hence the warnings on fish food package not to overfeed the fish.

If you find that your fish has passed through a whole cube of bloodworms before the food expiration date, you may find yourself tempted to thaw the whole cube at once and then feed it regularly. This seems like a logical solution, but we recommend that you thaw only what you need, because bloodworms are more likely to be exposed to harmful bacteria.

It is also important to avoid contact with bloodworms if possible to reduce the chance of an allergic reaction. Although this condition is rare, you should take it seriously.

Things you need to know before feeding

Before you start feeding, we recommend that you prepare the following tools and equipment:

1.Healthy freshwater fish in a clean and balanced fish tank

2.Gloves

3.Frozen Bloodworm

4.Small container

5.Stirrer

6.Pipette or tweezers for target feeding

7.Net for cleaning

Section the Correct amount

The number of blood worms feeding the fish varies according to the size of the fish tank and the number of fish. Typical fish feeding guidelines advise you not to feed more than 3 minutes of consumed food because excess food can cause contamination and therefore harm the fish. If you are worried that some fish eat more than others, or you do not yet know how much food the fish consume, we recommend that you use the instructions on the packaging, talk to the aquarium experts or continue to read to learn how to conduct feeding tests. The frequency and timing of feeding are also important, depending on the species of your fish, especially if you have nocturnal fish. Fish, especially cold-water fish will eat way more than they actually need, excess food will pass through them and become a problem! One of the best ways to check if you are feeding too much is to test the water regularly, and if there is any sign of deterioration or turbidity in the water, reduce the feeding.

How do you feed bloodworm to fish

Thaw the Bloodworm

Although many fish owners will be happy to throw frozen bloodworm into the tank, this should be avoided, especially when your fish is sensitive to temperature changes. Their digestive system may also be uncomfortable. We recommend filling a small dedicated container partially filled with water from the tank and using it to thaw frozen bloodworms for no more than a minute or so and may require some interference to break the bloodworms apart. The freezing process is usually a destructive process, and the frozen cube contains smaller particles and juices that the fish will not eat. As a result, the biological load on the filter is increased and therefore straining the defrosted food through a net is an excellent way of avoiding this problem.  

If you don’t know how much to feed, thaw the entire cube as excess food can be discarded or can be kept for some time. Make sure to check the weight of the cube manually or by checking the packaging.

How to feed

Mass Feeding – For those who can determine the amount of the fish food and are confident that the fish will consume it all, they can be added to the tank at once, but we recommend pouring food along the entire length of the fish tank to ensure even distribution.

Target Feeding – If you’re worried that some fish or other creatures don’t get enough food, then it can be ideal to use tongs, tweezers, pipette or even a length of plastic pipe to guide food and feed the fish independently.

Feeding Test

To test how much food your fish needs, start feeding with a small dose. If you have a plastic spoon or fork available, you may find that your fish will eat from this. Once you are satisfied that your fish has eaten a lot, weigh the rest of the food and store it in a container with a clear label in the fridge. Deduct this weight from the weight of the total cube to identify your feeding amount. This can be cut from the frozen block for future feedings.

Feeders

Worm feeders or feeding rings can be a good way to keep food in one place while fish can’t eat it all, just as cats and dogs know where to eat. Fish will get used to this way and often gather around the leader. You can also use automatic feeders, but these feeders are only used for dried or freeze-dried foods.

Clean up & storage

After five minutes, use tongs or tweezers to remove all the uneaten food and store the excess in a clearly labeled container in the fridge. Clean all used equipment and prepare for next feeding, wipe the surface with disinfectant and wash hands thoroughly. If your fish start to show signs of abnormal behavior, contact your bloodworm supplier or consult a fish specialist at a store or online.

If you want to know fish tank water pump and filter,fish tank water temperature regulator and so on. You can contact us,we also provide fish tanks for sale online.

room divider fish tank for sale

What is a fish feeding ring?

A fish feeding ring may be one of the simplest aquarium equipment you will buy.

In fact, the basic feeding ring consists of only three parts.

1. Suction cup –Fixed on the glass of the aquarium and fixed the feeding ring in place.

2. Lever – Allow the feeding ring to rise or fall with the water level.

3. Feeding ring – floating on the water to hold the fish food in the place.

The working principle of feeding a fish ring is simpler than its structure…

Simply attach the feeding ring to your aquarium glass so that the ring itself can float on the surface of the water.

Then, all that’s left to do is add your fish food…

Like this, the ring contains all the fish food – preventing it from floating around your aquarium. Obviously, this applies only to fish food located on the surface of the aquarium, like floating pellets and flakes. However, if floating food is a major part of the fish diet, then the feeding ring can bring many benefits.

While the word “ring” implies something that is round, it is not true of all fish feeding rings. Fish feeding rings have various shapes and sizes, from small round rings to large squares – or any other shape!

Why do you need a large fish feeding ring?

1. It prevents fish food from floating away

Are you bored with your fish flakes being sucked up by the filter or flushed off before your fish have a chance to eat them all?

The feeding ring can keep the food in place when the fish eat their fill, not only to prevent waste but also to reduce the rotting food left behind – these things do destroy your water quality.

The feeding ring is therefore usually used in conjunction with the automatic fish feeder – when the feeding ring holds the food in place, the feeder distributes the food into the water.

2. Multiple rings for multiple fish

Does a fish like to bully others away at feeding time? Set multiple feeding rings. Bullies can’t hog all the feeding rings.

But feeding rings can be used for more than just holding fish food…

3. Stop floating plants from moving around

Does your aquarium contain floating plants? You can use a feeding ring to trap them, preventing them from freely roaming around.

4. Bubble nest friendly

This tip will only benefit those of you who own fish that make bubble nests.

Fish like betta and gourami like to build bubble nests on objects that break the surface of the water, such as a plant, rock or… a fish food feeding ring.

This feeding ring not only provides a calming area for your fish to form a bubble ring, but it can also be easily scooped out when you need to clean the fish tank.

What is the ideal location for a fish feeding ring?

The advantage of fixing the feeding ring to the side of the tank is that you can permanently fix them in a quiet position with minimal water flow. This is important. The feeding ring cannot only keep the food of the fish in one range, while the turbulent water can cause the food to leak out of the feeding ring.

Now, the perfect spot for you to set up your feeding rings will entirely depend on your aquarium setup.

As you know, the filter return, powerheads, circulation fans and a whole manner of other equipment can agitate the surface of your aquarium.

The obvious point is not to place the feeder ring directly above the air stone – the rising bubble causes the food to shoot directly from the ring.

But the good news is that once you find the ideal feeding spot, you don’t need to move it unless you rearrange or add new aquarium equipment that affects the flow of water.

As you can see, a fish feeding ring is a great way to stop food from floating around your tank.

Their design styles and features may not have many options, but a fish feeding ring is definitely an essential tool during feeding time.

Do you use fish feeding rings in the aquarium? If you are interested, check out other aquarium products now! And we also provide large fish tank ornaments.

Hair Algae – Causes and How to Get Rid of Them

You have a beautiful fish tank with live creatures, beautiful aquarium plants and so on, and suddenly everything turns into a green carpet-like surface. What is causing this and how can you get rid of it? This article will attempt to provide answers to all of these questions and provide some information about hair algae, as well as different methods to help prevent and get rid of them. Read on for all of this information.

There are so many different types of algae that it is very difficult and sometimes even impossible to distinguish them. Most owners of aquariums come across different types of algae in the tank.

The Causes of Hair Algae in the Tank

This type of algae belongs to the genus Oedogium. Appearing in saltwater for a short time hair algae can cover the entire tank. If you don’t take steps to stop them from growing, they will take over the entire tank. And this is something an aquarium keeper doesn’t want to see. Also, if you notice the early appearance of algae, try to get rid of it as soon as possible. Over time, it will spread more which will become more and more difficult to get rid of the algae.

Hair algae survive with the help of phosphates and nitrates. Therefore, when the levels of phosphate and nitrate are high, hair algae are very likely to appear in your tank.

Normally, hair algae are formed during the tank’s cycle period, when it is still looking for biological balance. After some time hair algae will disappear, especially with the help of algae-eating tanks inhabitants. Another cause of hair algae can be light, especially when the light in your tank is too bright then hair algae will spread even faster. Co2 can also cause hair algae, a perfect level of CO2 in the tank should be 20-30 ml per liters.

How to prevent and get rid of hair algae?

It’s a real pain to get rid of hair algae and you need to understand that it will take you some time. Also, you may not be able to get rid of hair algae completely at the beginning.

One of the most obvious ways to remove hair algae is to tear it off. You really have to tear the hair algae off the rocks. Turn the filter off so the ripped parts will not move around and fall into hiding places where they can grow again. You can do it with rubber gloves or even without. Juts carefully rip all the hair algae from your tank. This way you will solve half of the problem. After that, you have to work hard to maintain that achievement.

Since hair algae are present in the aquarium water when phosphates and nitrates are present, this means that if you want to get rid of hair algae, you need to lower the levels of phosphate and nitrate. The level of phosphate should be .05 ml per liter and the level of nitrate should be 10ml per liter.

As mentioned above, the light may be one of the reasons hair algae appear in water tanks. To prevent this, you need to reduce the brightness of the light in the fish tank. Decreasing light intensity does not cause green hair algae to spread quickly in your tank.

Another effective way to help get rid of hair algae is by consuming the algae through algae eaters.

Buy some fish or other aquarium inhabitants that can feed on algae hair and they will do the job for you. For example, you can buy Ameca splendens, flagfish Jordanella floridae, mollies or other algae, eaters. Also, ghost shrimps are algae eaters so they can also be helpful.

The next way that can help prevent and get rid of hairy algae is to change the water. If you notice that your tank has an excess of nutrients, then you need to change the water from time to time in the aquarium to solve that issue.

Plants in the aquarium can be another useful way to prevent hair algae from appearing. First of all, you need to choose healthy plants to grow in your tank. The way that plants can help you with algae is that the more plants there are in the tank the less space there will be for algae. Also, plants create shade in the tank which will make it harder for algae to spread around.

Also, you can try algae control products. Algaecides can be very helpful, although some people think that these products do not solve the problem, only solve the problem of algae growth and reproduction in a short time.

Liquid carbo can also help fight hair algae. Because hair algae hate liquid carbo, adding these to the water tank every day can be very effective. But if you want better results, you can choose to apply the liquid carbo directly to the specific area where you notice the most hair algae growing.

So in the end, hope this article will help you get rid of those annoying algae. You have to be patient when handling because this won’t take a short time, and the process will not be easy. But using the methods mentioned above you will start to see good changes. Some methods may work for some people, but may not work for others. It all depends on many factors, one of which is water. Because water is different around the world, one method may have different results for certain types of water. Although you don’t get good results after taking some measures, you don’t need to lose hope. Removal of algae can be very difficult, but it is absolutely possible.

Don’t forget to check out more aquarium products on our website! We provide fish tank lights for sale,led aquarium lights for sale and room divider fish tank for sale.

The Important for Light in an Aquarium Fish Tank

Most aquarium fish are used to live in the areas where they are exposed to natural sunlight all -day. In the wild, those fish that do not live in the deep sea, but live in shallower waters such as rivers or lakes, rely on sunlight to survive. Bright light stimulates all aspects of aquatic life. Bright light is great for the growth of aquatic plants in your aquarium, as well as aquatic animals like fish that live inside. That’s why your indoor water tank needs to replicate the natural environment as accurately as possible for aquatic life to live and grow healthy and happy.

Influence on Fish’s Behavior

Improper lighting can cause behavioral problems in fish because they now live in unnatural environments. Without proper light stimulation, fish may engage in aggressive behavior with their fish tank companions, and they may also hover near the surface of the fish tank due to lack of oxygen in the water. Poor lighting can also influence how much a fish will eat, if at all. The imbalance in the environment could cause stress on a fish. A fish may also become lethargic, spending more time toward the bottom and sides of the tank rather than swimming openly.

Establish Day and Night Cycles

Establishing day and night cycle is a great step to create a nature similar environment for aquarium creatures. When the lights are on, this simulates daylight, as if the sun is now coming out, shining on the water tank. Turn off the lights at night to simulate the night and let the fish enter the sleep cycle. The lights also help the fish see their food so they can eat normally and be put on the feeding schedule.

Provide Additional Warmth

If you choose to keep tropical fish in an aquarium, this advice will be very useful for you. As you should know, tropical fish breed in warm seawater. Your fish tank should have a fish tank temperature controller to control the temperature of the living water environment of this type of fish, but the light can also help. Maintaining the water temperature in as many ways as possible can improve the overall health of the fish. Without appropriate lighting, a fish’s color can begin to fade. The dulling of colors is never a good sign, meaning the fish is in poor health and stressed.

Aquarium Lighting Tips

True aquatic plants must be kept wet at all times or else they might die. Do not run them under running water, the chlorine can damage or even kill the plants. If you see a whitish slime on plants, this slime layer is good bacteria. Fish eat it, it is entirely natural, and is part of what keeps an aquarium in homeostasis.

Ensure that live plants are well anchored in the substrate. Do not plant in big thickets (bunches or clumps). The plants need room to grow and get full light on all the branches and leaves. Your fish should be able to swim cleanly around and through your aquarium plants.

Many aquarium plants can increase their numbers naturally. Vallisneria and similar plants send out runners under the substrate, which then sprout next to the parent plant. You can cut away the runners and replant them to start a new thicket.

Help the Ecosystem Thrive

Helping the ecosystem in the aquarium thrive is very important. Many advanced indoor water tanks are filled with live plants. Most freshwater aquatic plants are from shallow waters of Central and South American rivers. They can be used not only for decoration but also to filter the water in the water tank. Plants need light to photosynthesize. Some types of coral may also depend on sunlight to thrive, and they need adequate lighting to do so. Proper lighting is also needed for the desired mating. Stimulating a natural environment is key to making the fish as comfortable as possible. The most common and effective lighting method in the aquarium industry is LED lighting, which replaces the old standard fluorescent lamps. This light source is  energy-efficient, cheap, and available in a variety of sizes and spectrums. Led lights really make a difference to the aquarium lighting system.

By adding enough lighting to your fish tank, you can ensure that your fish has a healthy environment. Please contact an aquarium expert on how to install a suitable light source. We provide the cheap aquarium air pump,cheap aquarium decor and cheap aquarium lights. For more information or to make a purchase, please continue to visit our website senzeal.com or give us a call.

Can A Turtle Go In A Fish Tank?

Can turtles go and live in a fish tank? Yes, they can. In fact, for the vast majority of turtle owners, the fish tank may be the easiest habitat for them to keep turtles. There are many reasons, like the fish tank is good looking, easy to set up, and easy to get. They also come in various sizes, shapes, and types, which is another huge advantage. And it has aquarium decoration items online shopping,if you want to decorate your fish tank.

Turtles And Fish Aquariums

The fish tank is more versatile. They are nicer to enjoy. Most fish tanks are made of transparent glass. Many aquariums are of good construction quality, and even the general-purpose ones are sturdy and reliable. You can more easily place them on desks, tables, drawers, etc. They can add to the style of a room.

They are provided with varieties of sizes, shapes, and types. For instance, there are Aquariums as small as 5 gallons, and ones bigger than 125 gallons! Most aquariums are rectangular, however, there are also ones that are circular, square, etc.

Setting up these types of fish tanks is a million times easier than setting up tubs and outdoor ponds because: most filters are designed for fish tanks. Every single commercially-made basking dock I have ever seen is made for them as well. Other types of equipment, such as water heaters, are also made for fish aquariums.

Lastly, they are easy to get. They are easily found in supermarkets, pet shops and through online shopping venues such as our website.

Best Habitat For Box Turtles

For other turtle species, such as box turtles and tortoises, traditional aquariums are unnecessary for many aquarium owners. The reason is that traditional fish tanks are longer, but more importantly, the tanks are deeper, not wider, and you end up wasting a lot of space. I think that this is especially true for box turtles. Box turtles tend to spend most of their day on solid earth, but they still spend some amount of time in shallow waters.

If you use a traditional fish tank, you are basically forced to divide the bottom of the fish tank into a land area and a smaller shallow water area. What happens, in the end, is that unless you have an absolutely huge fish tank, you get a small area with soil, a very small shallow water area. There will be another issue to figure out how and where to put your sunlight, best fish tank filter (you still need something to clean the water), etc.

Best Tanks For Box Turtles

For box turtles and tortoises, the best environment is a plastic tote or container designed for reptiles. They are large at the bottom, but not very high. This maximizes the area of the ground space, but it also allows you to put a smaller water-filled plate, tray or container inside. You will also be able to place enough substrate for possible future excavations.

Because these totes or containers are designed for reptiles, many are well ventilated and very easy to use. For box turtles and tortoises, they require an environment that is more advanced, more space-saving, and cheaper than traditional fish tanks. The nice thing about these fancy set-ups in some aquariums is that you can add a lot of substrates to really let your box turtle dig and burrow. Because aquariums tend to be expensive, however, I wouldn’t recommend them for every single box turtle owner out there when there are alternatives that are nearly as good.

For most aquatic pet turtle owners, traditional glass fish tanks will be the best choice. This is because ordinary fish tanks look beautiful, easy to set up, and easy to obtain. Aquatic species, such as red-eared turtles and colored sea turtles, are best suited for fish aquariums because their length and depth are greater than their width, and you can put enough water in a small space for them. Other species such as box turtles and tortoises can also go and live in fish tanks, however, the depth of your fish tank is not important here, what is important is its floor space. Plastic reptile totes and containers also work well. If you decide to use a fish tank, try to choose one that has a lot of space, but is not too deep.

If you have any questions, please contact our aquarium expert now! Or you can go to the aquarium product category pages for more information. We provide aquarium ornaments for sale.

通过 WordPress.com 设计一个这样的站点
从这里开始